Building Real-Time Applications Using Angular and WebSocket (With Sample Code for a Chat Application)
Table of Contents
Real-time applications aren’t just about speed; they’re about creating an ongoing conversation between your system and your users. Whether you’re working with chat apps, live collaboration tools, streaming services, or financial dashboards, the key is delivering data as it happens. This isn’t about occasional updates—it’s about continuous interaction.
To build this kind of experience, you need the right tools. Enter Angular and WebSocket—a combination that brings both structure and efficiency. Angular, with its strong foundation in building scalable web applications, provides the architecture you need. Meanwhile, WebSocket ensures that the connection between your client and server remains open, allowing data to flow both ways without delay or inefficiency.
In this blog, we’re diving deep into building real-time applications with Angular and WebSocket. We’ll guide you from setting up the development environment to integrating WebSocket into your Angular app, ensuring that your users get the seamless, real-time interaction they expect.
Understanding Real-Time Applications
Real-time applications aren’t just a step forward—they’re a complete shift in how we think about user interaction. Instead of waiting for data to load or refresh at intervals, real-time apps deliver updates instantly, giving users a fluid, dynamic experience that traditional web apps just can’t compete with. The difference? Data isn’t pulled—it’s pushed, the moment it’s available.
Key Characteristics of Real-Time Applications
- Low Latency: Speed is the backbone of real-time apps. Every millisecond counts, and the goal is to deliver data with as little delay as possible. When data arrives instantly, the user experience remains smooth and responsive.
- Bidirectional Communication: Real-time isn’t a one-way street. These apps facilitate an ongoing conversation between client and server, where data flows seamlessly in both directions. This means users don’t just receive updates—they can send data back just as quickly.
- Continuous Updates: The days of hitting refresh are over. Real-time apps ensure that data is constantly updated, so users always see the latest information without needing to do a thing. The result? A truly live experience where the app stays in sync with the world around it.
In short, real-time applications offer more than just speed—they provide a more immersive, connected experience that redefines what web apps can do.
You May Also Read: Real-Time APIs: What They Are and Why They Matter
Use Cases for Real-Time Applications
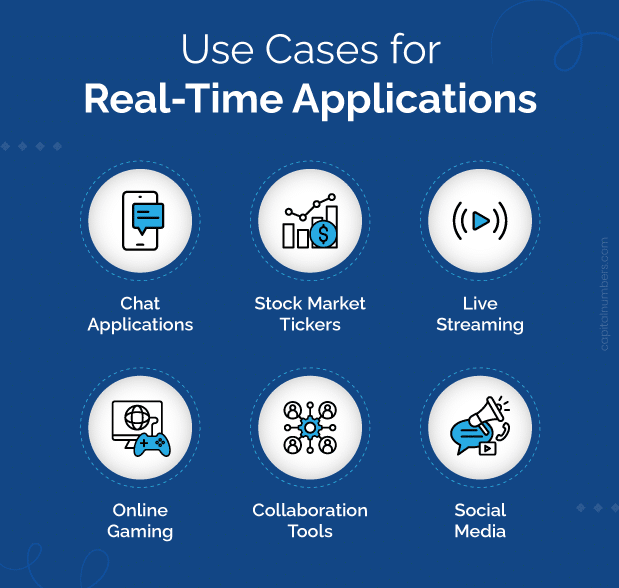
- Chat Applications: Imagine instant messaging where every keystroke, every message, is delivered in real-time. Collaboration tools take this further, keeping conversations fluid and interactive, with no delays or refreshes needed.
- Stock Market Tickers: In the world of trading, timing is everything. Real-time updates on stock prices and market trends give traders the edge they need to make decisions in the moment, when seconds can mean the difference between profit and loss.
- Live Streaming: Whether it’s video or audio, real-time technology powers live streaming by delivering content as it’s happening. There’s no waiting—just a continuous flow of information from the source to the audience.
- Online Gaming: Multiplayer games rely on real-time interactions. Every move, every action needs to be mirrored instantly across players to create a seamless, immersive experience. It’s real-time tech that ensures the game never skips a beat.
- Collaboration Tools: Think of real-time document editing, where teams can work on the same document simultaneously, regardless of location. Changes are reflected instantly, keeping everyone on the same page, quite literally.
- Social Media: Engagement is key, and real-time updates are what keep users coming back. Instant notifications, live content feeds—these are the features that make social media tick, keeping users connected and in the loop without delay.
Each of these use cases demonstrates how real-time technology doesn’t just enhance user experience—it fundamentally transforms it, turning static interactions into dynamic, live engagements.
Angular Basics
Angular has become a go-to JavaScript framework for building dynamic web applications. It’s powerful, flexible, and follows a component-based architecture that makes managing and maintaining complex apps much more straightforward.
Core Concepts
- Components: The heart of any Angular application. Components are the building blocks that encapsulate both functionality and UI, making your app modular and easier to work with.
- Templates: These are your HTML files that define what the component’s view will look like. Think of them as the structure and content layout of your app’s UI.
- Data Binding: One of Angular’s standout features, data binding automatically keeps your data in sync between components and templates. It’s a two-way street that ensures your UI reflects the latest data and vice versa.
- Services: Reusable classes that provide functionality and data to your components. They’re your go-to for shared logic and data that doesn’t belong to any one component.
- Dependency Injection: Angular’s way of providing services to components. It’s a powerful mechanism that makes your code more modular, testable, and easier to manage.
- Modules: Angular organizes your app into modules, grouping related components, services, and directives together. This logical structure makes it easier to scale and maintain your app.
- Directives: Custom HTML attributes that let you modify the behavior of DOM elements. They’re how Angular extends HTML’s capabilities in your app.
- Pipes: These transform your data right in the templates, allowing you to format or manipulate data before it’s displayed to users.
You May Also Read: Angular Evolution: Updates, Tools & Community Growth
Project Setup with Angular CLI
The Angular CLI is a game-changer for setting up, developing, and testing Angular projects. It streamlines everything, so you can focus on writing code instead of wrestling with configurations. To kick off a new Angular project, just run this command:
ng new my-app
This command spins up a new Angular project directory, complete with all the necessary files and dependencies to get you started.
Key Files and Folders in an Angular Project
- src: This is where your application’s source code lives, including all your components, services, and templates.
- app: The root folder for your application’s components. This is where you’ll spend most of your time building out your app’s features.
- index.html: The main HTML file for your application. It’s the entry point for your app and the file that Angular will load into the browser.
- angular.json: The configuration file that holds all the settings for your Angular project. It’s where you control how your project is built and served.
- package.json: The file that manages your project’s dependencies. It’s essential for keeping track of the libraries and tools your app relies on.
By getting a firm grasp on these core concepts and leveraging the Angular CLI, you can set up and develop Angular applications efficiently, laying a solid foundation for your project’s success.
WebSocket Basics
WebSocket is a game-changing communication protocol that allows for persistent, full-duplex communication between a client and a server over a single TCP connection. Unlike the traditional HTTP model, which relies on a request-response pattern, WebSocket opens the door to real-time, bidirectional data exchange that can transform your application’s user experience.
Benefits of WebSocket
- Real-Time Data Updates: One of the standout features of WebSocket is its ability to push data to clients in real-time. This leads to a more dynamic and interactive user experience, which is essential for modern web applications.
- Reduced Latency: Compared to the traditional HTTP polling method, WebSocket drastically reduces latency. This means faster data delivery, which is critical for applications where timing is everything.
- Efficient Communication: WebSocket establishes a persistent connection that stays open as long as needed. This reduces the overhead associated with opening and closing connections repeatedly, leading to better performance.
- Scalability: WebSocket is built to handle a large number of concurrent connections, making it ideal for applications that need to scale and maintain real-time interactions with many users at once.
WebSocket Protocol and Handshake Process
- Initiation: The process starts when the client initiates a WebSocket connection by sending an HTTP upgrade request to the server. This request is a signal that the client wants to switch from the traditional HTTP protocol to WebSocket.
- Server Response: The server then responds to this upgrade request, indicating whether it’s willing to establish a WebSocket connection. If the response is positive, the connection is accepted.
- WebSocket Connection: Once accepted, a WebSocket connection is established, allowing both the client and server to communicate freely.
- Data Exchange: With the connection in place, data can be sent and received in real-time, without the need for additional handshakes or connection setups.
Client-Server Communication
- Message Framing: WebSocket messages are framed using a specific format designed for efficiency. This ensures that data is transferred quickly and reliably between the client and server.
- Asynchronous Communication: One of the strengths of WebSocket is its support for asynchronous messaging. Messages can be sent and received independently, without blocking the main application thread, which keeps your app running smoothly.
- Event-Driven Programming: WebSocket applications often leverage event-driven programming models. This approach allows your application to react to incoming messages in real-time, triggering the appropriate actions based on the data received.
By understanding how WebSocket works and the advantages it brings, you can leverage this technology to build robust, real-time applications with Angular that deliver an exceptional user experience.
Integrating WebSocket into Angular
Integrating WebSocket into your Angular application is all about creating a seamless service that manages connections and message handling. Here’s how you can set it up to power real-time features in your app.
Creating a WebSocket Service
First, you’ll need to create a service in Angular to handle your WebSocket connections. This service will be responsible for managing the communication between your Angular app and the server. Here’s a basic example using the @angular/websocket package:
import { Injectable } from '@angular/core';
import { webSocket, WebSocketSubject } from 'rxjs/webSocket';

@Injectable({
    providedIn: 'root'
})
export class WebSocketService {
    private socket$: WebSocketSubject;

    constructor() {
    this.socket$ = webSocket('ws://localhost:8080');
    }

    send(message: any) {
    this.socket$.next(message);
    }

    receiveMessages() {
    return this.socket$.asObservable();
    }
}
This service establishes a WebSocket connection and sets up methods for sending and receiving messages.
Establishing a WebSocket Connection
Within your WebSocketService, the WebSocket connection is created using WebSocketSubject, which connects to the specified URL (in this example, ws://localhost:8080). This is the foundation of your real-time communication.
Handling WebSocket Messages
To handle incoming messages, you’ll want to subscribe to the asObservable() method of your WebSocketSubject. This allows you to react to messages as they arrive from the server:
this.webSocketService.receiveMessages().subscribe(
    (message: any) => {
      // Handle incoming message
      console.log(message);
    },
    (error: any) => {
      // Handle error
      console.error(error);
    },
    () => {
      // Handle completion
      console.log('WebSocket connection closed');
    }
  );
This setup ensures you can process messages, handle errors, and manage the WebSocket lifecycle effectively.
Managing the WebSocket Lifecycle
When working with WebSocket in Angular, there are a few lifecycle considerations to keep in mind:
- Connection Establishment: Make sure the WebSocket connection is up and running before attempting to send or receive messages.
- Error Handling: Implement robust error handling to manage connection failures or unexpected messages gracefully.
- Disconnection Handling: Plan for disconnections by implementing logic to attempt reconnections or handle the loss of connectivity smoothly.
- Message Validation: Always validate incoming messages to safeguard your application from potential security threats.
By following these steps, you’ll be able to effectively integrate WebSocket into your Angular application, enabling real-time features that enhance the user experience.
Build fast, real-time applications with Angular. Hire top Angular Developers and deliver a seamless user experience.
Building a Real-Time Chat Application with Angular and WebSocket
Creating a real-time chat application involves a few key steps, and with Angular and WebSocket in your toolkit, you’re well on your way to building something dynamic and interactive. Here’s how to get started:
Setting Up the WebSocket Server
- Choose a WebSocket Server Library: The first step is selecting the right library for your WebSocket server. Depending on your preferred language or framework, you have several solid options. For Node.js, Socket.IO is a popular choice; for .NET, WebSocketSharp works well, and Autobahn is a strong option for Python.
- Create a Server-Side Application: With your library chosen, the next step is to set up your server-side application. This is where the heavy lifting happens, so choose your language and framework wisely to suit your project’s needs.
- Configure WebSocket Routes: You’ll need to define routes on your server to handle WebSocket connections and messages. These routes will manage the flow of communication between your clients and the server.
- Handle WebSocket Connections: Implement the logic needed to accept WebSocket connections, manage client sessions, and broadcast messages to all connected clients. This is where your server orchestrates the real-time magic.
Creating an Angular Component for the Chat Interface
- Create a New Angular Component: Start by using the Angular CLI to generate a new component that will serve as the foundation of your chat interface. This component will be the face of your chat application.
- Design the Component Template: In your new component, design an HTML template that includes elements for displaying messages, sending new ones, and showing user information. The goal is to create an intuitive and responsive UI.
- Define Component Logic: In the component’s TypeScript class, you’ll write the logic to handle interactions with your WebSocket service, update the UI, and manage the chat’s state. This is where you bring the chat interface to life.
Implementing Real-Time Message Exchange
- Establish a WebSocket Connection: Use the WebSocket service you created earlier to establish a connection between your Angular app and the WebSocket server. This connection is the backbone of your real-time chat functionality.
- Send and Receive Messages: Implement the logic to send messages from the client to the server, and to handle incoming messages from the server. This ensures that the chat interface remains updated in real time.
- Broadcast Messages: On the server-side, set up the logic to broadcast messages to all connected clients. This will update the chat interface for everyone involved, making sure that all participants stay on the same page.
Adding Features like User Authentication and Message History
- User Authentication: To add a layer of security, implement a user authentication system that allows users to log in or register before accessing the chat application. This helps manage user sessions and ensures a more personalized experience.
- Message History: Store and retrieve previous chat messages so users can scroll through past conversations. This feature is essential for maintaining context in ongoing chats.
- Private Messaging: Enhance your chat application by enabling users to send private messages to specific individuals. This feature adds depth and functionality to your chat platform.
- Group Chats: Take it a step further by creating group chat rooms, allowing multiple users to communicate in dedicated spaces. This is especially useful for team collaboration or community discussions.
- Additional Features: Consider adding extra features like file sharing, emoji support, and real-time typing indicators to enhance the user experience. These small touches can make a big difference in how users interact with your chat app.
By following these steps and leveraging the power of Angular and WebSocket, you’ll be able to build a robust, feature-rich real-time chat application that’s ready for anything.
Sample Code for Building a Real-Time Chat Application
Setting Up the WebSocket Server (Node.js with Socket.IO)
``javascript const express = require('express');
const app = express();
const http = require('http').createServer(app);
const io = require('socket.io')(http);
io.on('connection', (socket) => { console.log('a user connected');
socket.on('disconnect', () => { console.log('user disconnected'); });
socket.on('chat message', (msg) => { io.emit('chat message', msg); }); });
http.listen(3000, () => { console.log('listening on *:3000'); });
Creating an Angular Component for the Chat Interface
```typescript
import { Component, OnInit } from '@angular/core';
import { WebSocketService } from './web-socket.service';

@Component({
    selector: 'app-chat',
    templateUrl: './chat.component.html',
    styleUrls: ['./chat.component.css']
})
export
class ChatComponent implements OnInit {
    messages: any[] = [];
    newMessage: string = '';

    constructor(private
webSocketService: WebSocketService) {}

    ngOnInit() {
    this.webSocketService.receiveMessages().subscribe(
        (message: any) => {
        this.messages.push(message);
        },
        (error: any) => {
        console.error('WebSocket error:', error);
        },
        () => {
        console.log('WebSocket connection closed');
        }
    );
    }

    sendMessage() {
    this.webSocketService.send(this.newMessage);
    this.newMessage = '';
    }
}
Creating an HTML Template
HTML
<div *ngFor="let message of messages">
    <p>{{ message }}</p>
</div>

<input type="text" [(ngModel)]="newMessage">
<button (click)="sendMessage()">Send</button>
Implementing Real-Time Message Exchange (WebSocket Service)
TypeScript

import { Injectable } from '@angular/core';
import { webSocket, WebSocketSubject } from 'rxjs/webSocket';

@Injectable({
    providedIn: 'root'
})
export class WebSocketService {
    private socket$: WebSocketSubject;
    constructor() {
    this.socket$ = webSocket('ws://localhost:3000');
    }

    send(message: any) {
    this.socket$.next(message);
    }

    receiveMessages() {
    return this.socket$.asObservable();
    }
}
Component Logic
TypeScript

ngOnInit() {
    this.webSocketService.receiveMessages().subscribe(
    (message: any) => {
        this.messages.push(message);
    },
    (error: any) => {
        console.error('WebSocket error:', error);
    },
    () => {
        console.log('WebSocket connection closed');
    }
    );
}

sendMessage() {
    this.webSocketService.send(this.newMessage);
    this.newMessage = '';
}
Remember to replace ws://localhost:3000 with the actual WebSocket URL of your server.
This code provides a basic structure for a real-time chat application. You can customize it further to add features like user authentication, message history, and more.
Advanced Topics in WebSocket Development
As you dive deeper into WebSocket development, there are several advanced topics worth exploring to ensure your applications are not only functional but also resilient, efficient, and scalable.
Handling WebSocket Errors and Disconnections
Error Handling: No system is perfect, and WebSocket connections are no exception. Implementing robust error handling is crucial for gracefully managing connection issues, message parsing errors, and other potential problems. It’s about keeping your app stable, even when things go wrong.
Reconnection Strategies: WebSocket connections can drop due to network issues or other factors, but that shouldn’t be the end of the story. Implement automatic reconnection logic to re-establish the connection quickly and keep the user experience seamless.
Error Logging: When errors do occur, having detailed logs can make all the difference. Logging error messages helps you identify and troubleshoot problems effectively, ensuring you can address issues before they impact users.
Optimizing WebSocket Performance
Message Compression: Bandwidth is always at a premium, so compressing WebSocket messages is a smart move. This reduces the amount of data being sent and improves overall performance, especially in high-traffic scenarios.
Batching Messages: If you’re sending a lot of small messages, consider batching them into a single, larger message. This reduces the number of network round trips, which can significantly enhance performance.
Heartbeat Messages: To keep the connection alive and detect network issues early, send regular heartbeat messages. This simple technique helps maintain a stable connection and ensures timely detection of any problems.
Server-Side Optimizations: Don’t forget about your server. Optimize it for performance by using asynchronous programming, efficient data structures, and other best practices to handle WebSocket traffic smoothly.
Building Scalable Real-Time Applications
Horizontal Scaling: As your application grows, you’ll need to handle increased traffic. Horizontal scaling—distributing the load across multiple servers—is essential for maintaining performance under heavy loads.
Message Queuing: Use message queues to buffer incoming messages and process them asynchronously. This approach helps manage spikes in traffic and ensures your application can handle large volumes of messages without getting overwhelmed.
Caching: To reduce server load and improve response times, implement caching for frequently accessed data. This not only speeds up your application but also makes it more resilient under load.
Load Balancing: Distribute incoming WebSocket connections across multiple servers with load balancing. This ensures even distribution of the load and prevents any single server from becoming a bottleneck.
Integrating with Third-Party WebSocket Libraries
Choose the Right Library: Selecting the right WebSocket library is crucial. Look for one that’s well-suited to your programming language and framework, and that meets the specific needs of your project.
Leverage Built-In Features: Many WebSocket libraries come with built-in features for handling connections, messages, and errors. Take full advantage of these to simplify your development process and enhance your app’s functionality.
Customize Functionality: Sometimes, the out-of-the-box features aren’t enough. Don’t hesitate to extend the library’s functionality to meet your specific requirements, ensuring your application does exactly what you need it to.
By tackling these advanced topics,you’ll be equipped to build robust, scalable, and high-performance real-time applications with WebSocket and Angular. These strategies will help you stay ahead of the curve and deliver a top-notch user experience.
You May Also Read: Hiring Angular JS Developers: What You Need to Know!
Conclusion
Throughout this blog, we’ve walked through the key steps to building real-time applications with Angular and WebSocket. From understanding WebSocket technology to setting up Angular components and services, and handling messages effectively, we’ve covered the foundational elements you need to get started.
By applying the techniques we’ve discussed, you’ll be well on your way to creating dynamic, interactive real-time applications that deliver an exceptional user experience. Whether you’re building a chat app, a live dashboard, or any other real-time feature, these tools and strategies will help you build something that truly stands out.