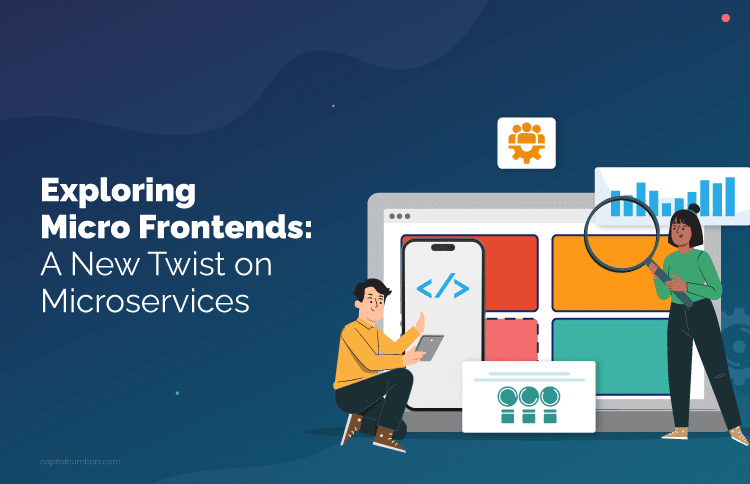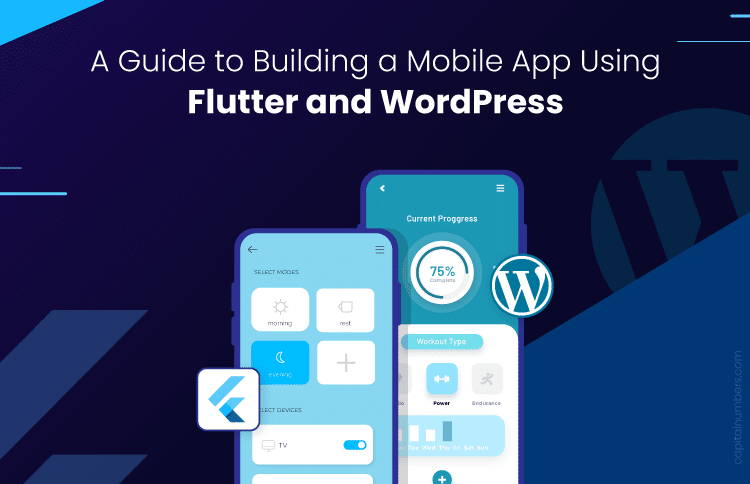
A Guide to Building a Mobile App Using Flutter and WordPress
Table of Contents
Mobile apps are vital for businesses today because they boost customer engagement, simplify operations, and give companies a competitive edge. Using Flutter offers advantages like fast development, expressive UI, and native performance. Combining Flutter with a WordPress backend allows for seamless content management and easy updates. This blog will show you how to create a mobile app using Flutter and WordPress.
Benefits of using Flutter for Mobile App Development
Flutter is an open-source framework created by Google for building natively compiled applications for mobile, web, and desktop from a single codebase. It uses the Dart programming language and provides a rich set of pre-designed widgets and tools. Following are the benefits of building a mobile app with Flutter:
- Fast Development: With Flutter’s hot reload feature, you can see changes in real time without restarting your app.
- Expressive and Flexible UI: Flutter offers a wide variety of customizable widgets that help create visually appealing and responsive user interfaces.
- Native Performance: Flutter compiles to native ARM code, ensuring high performance on both iOS and Android devices.
Key Features and Components:
- Widgets: Building blocks of Flutter apps that represent UI components.
- Dart Language: Modern, fast, and easy-to-learn language used by Flutter.
- Hot Reload: Instant reflection of code changes without restarting the app.
- Rich Set of Pre-designed Widgets: Enables the creation of complex UIs with ease.
- Cross-Platform Development: Single codebase for both Android and iOS.
Why Use WordPress as a Backend?
WordPress is a widely used open-source content management system (CMS) that powers over 40% of websites on the internet. It is highly customizable with plugins and themes.
- Ease of Use: WordPress is user-friendly and allows for easy content management without needing extensive technical knowledge.
- Extensibility: With a vast ecosystem of plugins and themes, WordPress can be tailored to suit various needs.
- Community Support: Large, active community providing regular updates, plugins, and support.
The WordPress REST API allows developers to interact with WordPress sites programmatically. It provides endpoints for accessing and manipulating WordPress content (posts, pages, users, etc.) using standard HTTP methods. This makes it an excellent choice for a backend, enabling Flutter apps to fetch, create, update, and delete content seamlessly.
Set Up the Development Environment
Prerequisites
To get started, you’ll need the following tools and software:
- Flutter SDK: The software development kit for Flutter.
- IDE: Android Studio or Visual Studio Code, both compatible with Flutter.
- WordPress Setup: A WordPress site to act as your backend.
Install Flutter
Follow these steps to install Flutter SDK:
- Download Flutter SDK: Visit the Flutter website and download the appropriate SDK for your operating system.
- Extract the Files: Unzip the downloaded file to a desired location on your system.
- Add Flutter to Path: Add the Flutter bin directory to your system’s PATH environment variable.
- Verify Installation: Open a terminal and run flutter doctor to check for any dependencies you need to install.
Set Up the IDE
- Install Android Studio:
- Download and install Android Studio.
- Open Android Studio and follow the setup wizard to install the required SDK tools.
- Install Flutter and Dart Plugins:
- In Android Studio, go to Preferences > Plugins.
- Search for and install the Flutter and Dart plugins.
- Set Up Visual Studio Code (Optional):
- Download and install Visual Studio Code.
- Install the Flutter and Dart extensions from the Extensions view.
Verify the Installation
- Open a terminal and run flutter doctor again.
- Ensure all checkmarks are green, indicating that Flutter is properly set up.
Set Up a WordPress Site
- Install WordPress:
- Set up a local or hosted WordPress site by following the installation instructions on the WordPress website.
- Install Necessary Plugins:
- Install plugins like “WP REST API” to enable API access.
- Go to the WordPress dashboard, navigate to Plugins > Add New, and search for the required plugins.
- Install and activate the plugins to ensure your WordPress site can interact with your Flutter app.
By following these steps, you’ll have your development environment ready for building a mobile app with Flutter and WordPress.
Create a New Flutter Project
Initial Project Setup
- Open Your IDE: Launch Android Studio or Visual Studio Code.
- Start a New Project:
- In Android Studio: Go to “File” > “New” > “New Flutter Project.”
- In Visual Studio Code: Open the command palette (Ctrl+Shift+P) and select “Flutter: New Project.”
- Project Details:
- Enter a project name.
- Choose a project location.
- Click “Next” and complete the setup.
Understand the Project Structure
- lib/main.dart: The main entry point for your app. This is where you’ll find the initial code for the default Flutter app.
- pubspec.yaml: Contains metadata about the project, such as dependencies and assets.
- android/ and ios/ folders: Platform-specific code for Android and iOS.
- test/: Contains unit and widget tests for your app.
Run the Default Flutter App
- Ensure Device or Emulator is Ready:
- Connect a physical device via USB, or
- Start an emulator/simulator from Android Studio or Xcode.
- Run the App:
- In Android Studio: Click the green play button in the toolbar.
- In Visual Studio Code: Open the command palette (Ctrl+Shift+P) and select “Flutter: Run.”
- See the Results:
- The default Flutter app should launch on your connected device or emulator.
- The app typically displays a simple counter that increments each time you press the button.
By following these steps, you’ll create and run a basic Flutter project, providing a foundation to build upon with your custom features and WordPress integration.
Connect Flutter to WordPress
Overview of WordPress REST API Endpoints
The WordPress REST API provides various endpoints for accessing different types of content. Common endpoints include:
- /wp-json/wp/v2/posts: Retrieve posts.
- /wp-json/wp/v2/pages: Retrieve pages.
- /wp-json/wp/v2/categories: Retrieve categories.
Authenticate API Requests (Optional for Advanced Users)
For advanced features like creating or updating content, you need to authenticate your requests. You can use methods like:
- Basic Authentication: Simple but less secure.
- OAuth: More secure and robust method.
Write Dart Code to Fetch Data from WordPress
- Add HTTP Package:
- Open pubspec.yaml and add http to dependencies.
- Run flutter pub get to install the package.
- Fetch Data:
- Import the http package in your Dart file.
- Use http.get to send a GET request to the WordPress API endpoint.
Build the User Interface
Design the App Layout
Start by sketching or wireframing your app’s design. Think about the user experience (UX) and how users will navigate through your app. Define the main screens and their purpose, like the home screen, post details, and categories.
Use Flutter Widgets to Build the Layout
Flutter provides a wide variety of widgets to create your app’s interface. Common widgets include:
- Container: For layout structure.
- Column and Row: To arrange widgets vertically and horizontally.
- ListView: To create scrollable lists.
- Text and Image: For displaying text and images.
For example, to create a simple layout with a header and a list of posts:
    Widget build(BuildContext context) {
        return Scaffold(
          appBar: AppBar(title: Text('My Blog')),
          body: ListView(
            children: [
              ListTile(title: Text('Post 1')),
              ListTile(title: Text('Post 2')),
              // Add more ListTiles for additional posts
            ],
          ),
        );
      }
Display WordPress Content
Fetch data from your WordPress site and display it using custom widgets. For example, create a PostWidget to display individual posts:
    class PostWidget extends StatelessWidget {
        final Post post;

        PostWidget({required this.post});

        @override
        Widget build(BuildContext context) {
          return ListTile(
            title: Text(post.title),
            subtitle: Text(post.excerpt),
          );
        }
      }
Implement Navigation for Different Sections
Use Flutter’s navigation to switch between different sections like categories and tags. For instance, use Navigator.push to navigate to a new screen:
    Navigator.push(
    context,
    MaterialPageRoute(builder: (context) => CategoryScreen(category: 'Tech')),
    );
By following these steps, you can design an attractive and functional user interface for your app, leveraging Flutter’s powerful widgets to display content dynamically fetched from your WordPress backend.
Implement Advanced Features
User Authentication
To enable user login and registration in your app, use the WordPress REST API:
- Login: Create a login form in Flutter. Send the user’s credentials to your WordPress site’s authentication endpoint.
- Registration: Similarly, create a registration form and send the new user details to the appropriate endpoint.
- Authentication Tokens: Store the authentication token received from WordPress securely in the app for managing sessions.
Manage User Sessions in Flutter
Use Flutter’s shared_preferences package to save and retrieve the user’s authentication token:
    SharedPreferences prefs = await SharedPreferences.getInstance();
    await prefs.setString('token', token);
This ensures the user stays logged in across app sessions.
CRUD Operations
- Creating Posts: Create a form in Flutter for users to input post details. Send this data to the WordPress REST API to create a new post.
- Updating Posts: Fetch the post data, allow the user to edit it, and send the updated data back to WordPress.
- Deleting Posts: Send a delete request to the WordPress REST API to remove a post.
Handling Forms and User Input in Flutter
Use Flutter’s form widgets to handle user input
    final _formKey = GlobalKey();

        Form(
          key: _formKey,
          child: Column(
            children: [
              TextFormField(
                decoration: InputDecoration(labelText: 'Title'),
                validator: (value) {
                  if (value == null || value.isEmpty) {
                    return 'Please enter some text';
                  }
                  return null;
                },
              ),
              // More form fields
            ],
          ),
        );
Real-Time Updates
Setting Up Push Notifications: Use Firebase Cloud Messaging (FCM) to send push notifications:
- Set Up Firebase: Create a Firebase project and add your app.
- Integrate FCM: Add the Firebase and FCM packages to your Flutter app.
- Handle Notifications: Write code to handle incoming notifications and display them to the user.
Using WebSockets or Firebase for Real-Time Content Updates
Implement WebSockets or Firebase to fetch updates instantly:
- WebSockets: Use the web_socket_channel package to open a WebSocket connection and listen for updates.
- Firebase Realtime Database: Use the firebase_database package to listen for changes in real-time and update your app’s UI accordingly.
By implementing these advanced features, you can enhance your Flutter app with user authentication, content management, and real-time updates, providing a more interactive and dynamic experience for your users.
Test and Debug the Flutter App
Unit Testing in Flutter
Unit testing ensures that individual parts of your app work as expected. In Flutter, you can write unit tests using the test package:
- Add the test Package: Include test in your pubspec.yaml file.
- Write Tests: Create a new test file and write tests to check the functionality of your Dart code. For example, to test a simple function:
void main() { test('adds one to input values', () { expect(addOne(2), 3); }); } - Run Tests: Use the terminal command flutter test to run your tests.
Integration Testing with the WordPress API
Integration tests ensure that different parts of your app work together correctly. Test the interaction between your Flutter app and the WordPress API:
- Set Up Integration Tests: Create an integration test directory and write tests that simulate user interactions and API calls.
- Mock API Responses: Use tools like http_mock_adapter to mock WordPress API responses.
- Run Integration Tests: Use the terminal command flutter drive to run your integration tests.
Debugging Tips
Common Issues and How to Resolve Them:
- API Errors: Check if your API endpoints and authentication tokens are correct. Use tools like Postman to test your API separately.
- UI Layout Problems: Use Flutter’s Layout Inspector to debug layout issues.
- Performance Issues: Use the flutter profiler to identify and fix performance bottlenecks.
Using Flutter’s Debugging Tools:
- Flutter DevTools: A suite of performance and debugging tools for Flutter. Use it to inspect the widget tree, view logs, and analyze performance.
- Hot Reload: Quickly apply code changes without restarting your app. This helps in identifying and fixing issues faster.
- Logging: Use print() statements or Flutter’s Logger package to log information and debug your code.
By following these steps, you can effectively test and debug your Flutter app, ensuring it functions correctly and provides a smooth user experience.
Deploy the App
Optimize the App for Performance
- Minimize Code Size: Use Flutter’s build modes (–release flag) to generate optimized builds.
- Efficient Asset Management: Compress images and use appropriate formats to reduce load times.
- Optimize Widgets: Avoid unnecessary rebuilds by using const constructors and efficient state management.
- Analyze Performance: Use Flutter’s performance tools to identify and fix performance bottlenecks.
Ensure Compatibility with Android and iOS
- Testing on Multiple Devices: Test your app on various devices and screen sizes to ensure compatibility.
- Platform-Specific Code: Implement platform-specific features using Flutter’s platform channels.
- Adhering to Guidelines: Follow Google’s Material Design guidelines for Android and Apple’s Human Interface Guidelines for iOS to ensure a native look and feel.
Steps to Publish the App on Google Play Store
- Create a Google Play Developer Account: Sign up and pay the one-time registration fee.
- Prepare Your App:
- Build Release APK: Use flutter build apk –release to generate the APK.
- Sign Your App: Use keytool and jarsigner to sign the APK.
- Create an App Bundle: Use flutter build appbundle –release for optimized delivery.
- Upload to Google Play Console:
- Create a New Application: Fill in the app details, upload the APK or app bundle, and provide the necessary assets (icons, screenshots).
- Set Up Pricing and Distribution: Choose your app’s pricing model and countries where it will be available.
- Submit for Review: Review Google’s guidelines and submit your app for review.
Steps to Publish the App on Apple App Store:
- Create an Apple Developer Account: Sign up and pay the annual fee.
- Prepare Your App:
- Build Release APK: Use flutter build ios –release to generate the IPA.
- Configure App in Xcode: Open the project in Xcode, set the app’s bundle identifier, and configure signing.
- Upload to App Store Connect:
- Create a New App: Fill in the app details, upload the IPA, and provide necessary assets (icons, screenshots).
- Set Up Pricing and Availability: Choose your app’s pricing model and countries where it will be available.
- Submit for Review: Follow Apple’s guidelines and submit your app for review.
By following these steps, you can ensure your Flutter app is optimized, compatible, and ready for deployment on both the Google Play Store and the Apple App Store.
You May Also Read: How to Create and Add Home Screen Widgets in a Flutter Mobile Application
Future Enhancements of the App
Consider adding more advanced features to your app:
- Push Notifications: To keep users engaged with real-time updates.
- Offline Support: Allow users to access content even without an internet connection.
- Enhanced Security: Implement stronger authentication and data protection methods.
Build Your Next Mobile App with Our Expert Team
Looking to build a top-notch mobile app? From initial concept to final deployment, we handle every aspect of mobile app development. We tailor our services to meet your unique business needs and goals. Alternatively, you may hire our skilled Flutter developers who can work with your team to deliver exceptional results. Contact us today to discuss your project and get a free consultation!