Multi-Store Ecommerce Development Using Magento 2: A Comprehensive Guide
Table of Contents
In today’s interconnected world, businesses are expanding their reach to capture a global customer base. To succeed, they need platforms capable of serving diverse customer bases and adapting to regional differences. Magento 2 provides a powerful solution to achieve this goal.
This platform enables businesses to operate multiple online stores from a centralized backend, allowing for the creation of distinct brands or region-specific online shops. To overcome language barriers and enhance customer engagement, Magento 2 provides robust multi-language capabilities. This flexibility is essential to create tailored experiences for diverse customer groups and expand market reach.
This blog will explore the technical aspects of creating a multi-store, multi-language e-commerce platform using Magento 2. We’ll cover essential configurations, tools, and best practices to create an efficient and global online shopping platform.
Benefits of Multi-Store Ecommerce Solutions
A multi-store e-commerce solution offers several benefits:
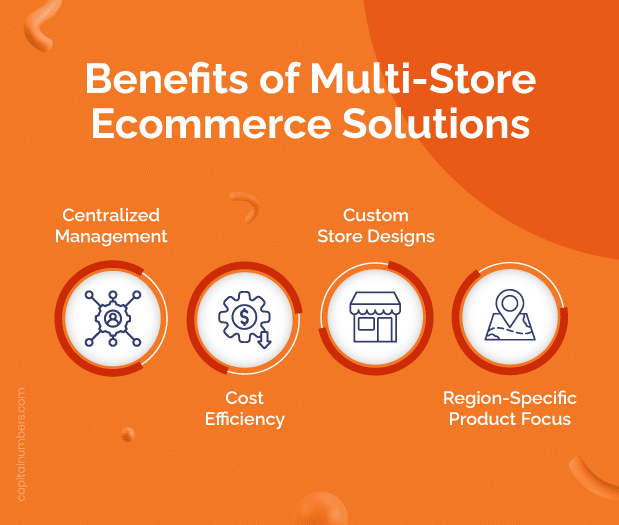
- Centralized Management: Manage multiple stores from a single control panel. This simplifies order processing, inventory management, and customer support.
- Cost Efficiency: Reduce the hosting and maintenance cost by operating multiple stores on a single Magento installation.
- Custom Store Designs: Give each store a unique look and feel that matches the local vibe or customer style.
- Region-Specific Product Focus: Feature products relevant to each store’s location to boost customer interest and sales.
Use Cases for Multi-Store Ecommerce
Multi-store setups are ideal for the following business models:
- Different Brands: A company that owns multiple brands can use separate stores for each brand while managing them under one Magento installation.
- Regional Stores: Businesses operating in different regions or countries can customize location-wise stores with local languages, currencies, tax rules, and cultural preferences.
- B2B and B2C Segments: Separate stores can be set up for business-to-business (B2B) and business-to-consumer (B2C) customers with differentiated pricing, product catalogs, and customer interfaces.
Understanding Multi-Store Architecture in Magento 2
Magento 2 Hierarchy:
Magento 2’s architecture is hierarchical and consists of four levels:
- Global: This is the top level, encompassing all settings that apply across the entire Magento installation, including configuration settings and extensions.
- Website: Each website can have its own base currency, payment methods, and shipping methods. Websites can also have different customer bases and share or separate orders and cart sessions.
- Store: Stores under a website share the same product catalog but can have different categories, price rules, and promotions.
- Store View: Store views offer the ability to change the language or view settings of a store. Each store can have multiple views, allowing customers to switch languages or currencies.
Sharing and Differentiating Products, Categories, and Customers:
- Shared Resources: Multiple stores on a website can share a product catalog, which helps with efficient product management and inventory control.
- Differentiation: While products can be shared across stores, each store can have its own unique product categories and target customer groups. This allows for customized marketing strategies and improved customer engagement.
Technical Setup to Create a Multi-Store in Magento 2
Steps to Create a New Website, Store, and Store View:
- Creating a New Website:
- Navigate to Stores > Settings > All Stores in the Magento admin panel.
- Click Create Website, enter a name, code, and sort order, and save.
- Creating a New Store:
- In the same section, click Create Store.
- Select the website, enter a name, assign a root category, and save.
- Creating a New Store View:
- Click Create Store View, select the store, enter a name, code, status, and sort order, and save.
Configuration of Different Domains or Subdomains for Each Store:
- Domain Setup:
- Assign a unique domain or subdomain to each store by configuring your web server (Apache or Nginx) to direct requests to the appropriate store view.
- Update the Base URL settings in Stores > Configuration > General > Web for each store view to match its assigned domain or subdomain.
Managing Shared Resources Like the Product Catalog Across Stores:
- Shared Product Catalog:
- By default, all stores under a single website share the same product catalog. However, you can configure products to be enabled or disabled per store view, providing flexibility in product availability.
- Configuring Categories:
- Categories can be customized for each store, allowing different stores to feature unique product selections or hierarchical structures.
- Customer Sharing Options:
- Configure customer account sharing between websites or keep customer data isolated per website for security and marketing segmentation purposes. This can be set in Stores > Configuration > Customers > Customer Configuration.
Implementing Multi-Language Capabilities in Magento 2
Language Pack Installation:
Magento 2 supports language packs that translate the interface and some content into different languages. Here’s how to find and install them:
- Finding Language Packs:
- Visit the Magento Marketplace or use repositories like GitHub to find community-contributed language packs.
- Installing Language Packs:
- Via Composer: Most language packs are installed using Composer. Run the following command in the terminal:
composer require mageplaza/magento-2-french-language-pack:dev-master - Manual Installation: Download the language pack and extract it to the “app/i18n/[vendor_name]/[language_code]” directory.
- Enable the Language Pack: Go to Stores > Configuration > General > Locale Options and select the installed language for the store view.
- Via Composer: Most language packs are installed using Composer. Run the following command in the terminal:
- Deploy Static Content:
- After installation, deploy the static content using:
php bin/magento setup:static-content:deploy fr_FR
- After installation, deploy the static content using:
Configuring Locale Settings for Different Store Views:
Magento 2 allows you to configure locale settings per store view to tailor the shopping experience. Here’s how:
- Navigate to Locale Options:
- Go to Stores > Configuration > General > Locale Options.
- Set Locale Per Store View:
- Select the store view you wish to configure and choose the appropriate locale (e.g., French for Canada, German for Germany).
- Customizing Locale-Specific Elements:
- Currency: Configure currencies by going to Stores > Currency > Currency Rates. Set up and update exchange rates as needed.
- Units: Ensure measurement units align with regional standards, typically adjusted in product attributes.
- Date Formats: Customize date and time formats in the locale settings to match local conventions.
Translating Product Descriptions, Categories, and CMS Pages:
- Product Descriptions and Categories:
- Use the Inline Translation Tool available in the Magento admin under System > Tools > Translation. This allows you to translate text directly from the storefront.
- For bulk translation, export product data using System > Data Transfer > Export, modify the translations in a CSV file, and re-import it using System > Data Transfer > Import.
- CMS Pages and Blocks:
- Create store view-specific versions of CMS pages and static blocks. Use the Content > Pages and Content > Blocks menus to duplicate and translate content for each store view.
Magento’s Inline Translation Tool and CSV Import/Export Functionality:
- Inline Translation Tool:
- Enable the tool via Stores > Configuration > Advanced > Developer under the Translate Inline section. This tool allows you to click on text in the frontend and provide translations directly.
- CSV Import/Export:
- Export translatable content via System > Data Transfer > Export, make translations in the CSV file, and re-import using System > Data Transfer > Import.
- Ensure the CSV file includes all necessary fields, such as “store_view_code, attribute_code”, and “value”.
Looking to build a powerful multi-store Magento platform? Hire our expert Magento developers for exceptional solutions.
Customizing the User Experience Across Multiple Stores
Adapting Themes for Different Stores and Languages:
Customizing the theme for each store view in Magento 2 allows businesses to provide a unique look and feel that resonates with specific audiences. This is crucial for enhancing brand recognition and improving the user experience across different markets.
- Theme Inheritance:
- Magento 2 supports theme inheritance, allowing you to create a child theme based on a parent theme. This way, you can customize specific aspects without affecting the base theme.
- Define a child theme by creating a “theme.xml” file under “app/design/frontend/[Vendor]/[Theme]/”.
- Store-Specific Themes:
- Assign different themes to different store views via Content > Design > Configuration. Select the desired store view and choose the theme to apply.
- Language-Specific Customizations:
- Customize language-specific assets such as images, icons, and logos. Place them in the respective theme directory under “web/i18n/[language_code]/”.
Using Magento’s Layout XML and LESS/CSS for Store-Specific Designs:
- Layout XML:
- Modify layout XML files to change the structure and layout of pages. These files are located in “app/design/frontend/[Vendor]/[Theme]/Magento_[Module]/layout/”.
- Use layout updates to add, remove, or alter blocks and containers based on store view or language.
- LESS/CSS Customization:
- Use Magento’s built-in LESS preprocessor to customize styles. Create a “styles-m.less” file in the theme directory for mobile-specific styles and a “styles-l.less” for desktop styles.
- To apply store-specific styles, create a new “less” file and import it conditionally based on store view by adding logic in the “styles-l.less” file.
- Responsive Design:
- Ensure designs are responsive and adapt seamlessly across different devices. Utilize media queries within LESS to provide optimal viewing experiences.
Magento’s Content Staging and Personalization Features for Targeted Promotions:
Magento 2 offers powerful tools for content staging and personalization, enabling businesses to tailor the shopping experience to individual customers or segments.
- Content Staging:
- Use content staging to schedule changes to content, products, and promotions. Access this feature under Marketing > Content Staging.
- Create campaigns with specific start and end dates to automatically activate and deactivate content changes.
- Personalization:
- Utilize Magento’s personalization features to deliver customized content. Use customer segmentation to target specific audiences based on criteria like purchase history, location, or behavior.
- Set up personalized experiences by creating dynamic blocks that display different content based on customer attributes or segments.
Implementing Store-Specific Banners, Promotions, and CMS Blocks:
- Store-Specific Banners:
- Create store-specific banners under Content > Elements > Banners. Assign them to specific store views to promote localized offers or messages.
- Use banner sliders for engaging visual promotions and configure their display settings in the backend.
- Promotions:
- Set up store-specific promotions using Marketing > Promotions. Configure catalog price rules and cart price rules tailored to each store view or customer segment.
- Use conditions and actions to define when promotions are applied and what discounts or incentives are offered.
- CMS Blocks:
- Create CMS blocks specific to each store view under Content > Blocks. Translate and customize the content to reflect regional differences or promotions.
- Integrate these blocks into layout XML or directly into pages to display relevant content dynamically.
- Dynamic Content Updates:
- Use Magento’s widgets to display dynamic content based on store view or customer interaction. Widgets can be configured under Content > Widgets to show content conditionally.
You May Also Read: A Comprehensive Guide on Magento 2 Development for eCommerce Success
Managing Inventory and Pricing Across Stores
Effective inventory management is crucial for maintaining a seamless shopping experience, especially in a multi-store setup. Magento 2 offers robust inventory management capabilities to handle stock across different stores.
Magento’s Inventory Management System for Multi-Store Environments:
- Inventory Sources:
- Magento 2’s Multi-Source Inventory (MSI) allows businesses to manage inventory from multiple locations. Define different inventory sources such as warehouses, stores, or drop shippers.
- Go to Stores > Inventory > Sources to create and manage inventory sources.
- Stock Management:
- Configure stock settings at Stores > Configuration > Catalog > Inventory. Set parameters for backorders, minimum/maximum quantity allowed in the cart, and more.
- Use Inventory > Stocks to map products to different sources and manage the stock levels.
- Inventory Updates:
- Automate inventory updates through integrations with ERP systems or other inventory management software using APIs.
- Manually update stock quantities via Catalog > Products or use CSV import/export functionality for bulk updates.
Setting Up Stock Availability Per Store:
- Store-Specific Stock Levels:
- Configure stock levels for each store by assigning inventory sources to specific websites or store views. This ensures accurate stock availability displays for each store.
- Define product availability per store view by navigating to the product edit page and setting the source quantities.
- Low Stock Alerts:
- Set up low stock alerts under Stores > Configuration > Catalog > Inventory to notify administrators when stock levels reach a predefined threshold, ensuring timely restocking.
- Out-of-Stock Behavior:
- Customize how out-of-stock products are displayed on the frontend. Choose to hide or show products with zero stock to manage customer expectations and enhance the shopping experience.
Configuring Store-Specific Pricing and Promotions:
Magento 2 offers various pricing strategies to cater to different markets and customer segments, allowing businesses to optimize pricing for profitability and competitiveness.
- Store View Pricing:
- Set different prices for products based on store view to cater to regional pricing strategies. Go to Catalog > Products, select a product, and configure the price for each store view in the Advanced Pricing section.
- Promotions and Discounts:
- Create store-specific promotions using Marketing > Promotions. Configure Catalog Price Rules and Cart Price Rules to offer discounts based on conditions like store view, product attributes, or customer segments.
- Use date ranges and priority settings to schedule and manage multiple promotions across different stores.
- Dynamic Pricing Adjustments:
- Implement dynamic pricing strategies by integrating with third-party services or using custom scripts to adjust pricing based on demand, competition, or market trends.
Tiered Pricing and Customer Group Pricing for Regional Variations:
- Tiered Pricing:
- Offer quantity-based discounts to encourage bulk purchases. Configure tiered pricing in the Advanced Pricing section of a product, specifying price breaks for different quantities.
- Set different tiered pricing rules per store view to reflect regional demand and purchasing patterns.
- Customer Group Pricing:
- Create different pricing strategies for specific customer groups, such as wholesale, retail, or VIP customers. Set this up under Stores > Configuration > Customer > Customer Groups.
- Assign special pricing to customer groups in the Advanced Pricing section of the product page, allowing for targeted pricing strategies.
- Regional Pricing Variations:
- Adjust pricing based on regional economic conditions, competition, or purchasing power. Use store view-specific pricing to implement these variations effectively.
- Currency Management:
- Enable multiple currencies for different store views under Stores > Currency > Currency Rates. Update currency exchange rates regularly to ensure accurate pricing.
Performance Optimization in a Multi-Store Environment
Optimizing performance is crucial for ensuring a fast and responsive user experience, especially in a multi-store Magento 2 environment. Proper caching and server configurations can significantly enhance the speed and efficiency of your Magento stores.
Using Varnish and Other Caching Mechanisms to Speed Up Multi-Store Setups:
- Varnish Cache:
- Varnish is a powerful HTTP accelerator that caches static and dynamic content, reducing server load and improving response times.
- Installation and Configuration:
- Install Varnish on your server and configure it to work with Magento by updating the “varnish.vcl” file, generated in Stores > Configuration > Advanced > System > Full Page Cache.
- Ensure Varnish is set as the caching application in Magento 2 by selecting Varnish Cache in the Full Page Cache settings.
- Backend Integration:
- Configure your web server (Apache or Nginx) to listen on port 8080 and set Varnish to listen on port 80. This setup allows Varnish to act as a reverse proxy between clients and the Magento backend.
- Redis Cache:
- Use Redis for session and cache storage to improve the performance of database-driven operations.
Configure Redis in the “env.php” file located in “app/etc/” to handle Magento’s cache and session storage:'cache' => [ 'frontend' => [ 'default' => [ 'backend' => 'Cm_Cache_Backend_Redis', 'backend_options' => [ 'server' => '127.0.0.1', 'port' => '6379', ], ], ], ], 'session' => [ 'save' => 'redis', 'redis' => [ 'host' => '127.0.0.1', 'port' => '6379', ], ],
- Use Redis for session and cache storage to improve the performance of database-driven operations.
- Browser Caching:
- Leverage browser caching by configuring headers in your web server configuration files, enabling browsers to store static resources locally and reduce load times for repeat visitors.
Configuring Full-Page Cache Settings for Different Stores:
- Full-Page Cache Configuration:
- Access full-page cache settings via Stores > Configuration > Advanced > System > Full Page Cache.
- Choose the appropriate caching method (Varnish or Built-in Cache) and set cache lifetimes based on your website’s needs to ensure fresh content delivery without overloading the server.
- Store-Specific Cache Settings:
- Configure cache settings per store view if necessary, allowing for tailored caching strategies based on traffic patterns or content update frequency.
- Utilize the “cache.xml” file to define custom cache configurations and behaviors for specific stores or pages.
- Cache Invalidation:
- Implement cache invalidation strategies to ensure that updates to content or products are reflected in real-time. Use Magento’s cache management tools to manually clear caches when needed.
Optimizing Database Queries for Multi-Store Environments:
- Index Management:
- Regularly update and manage indexes to improve query performance. Use the command line to reindex data: “php bin/magento indexer:reindex”
- Configure automatic reindexing during off-peak hours to minimize performance impacts on live stores.
- Query Optimization:
- Analyze and optimize slow queries using MySQL’s slow query log. Adjust query structures, add appropriate indexes, and avoid full table scans where possible.
- Use Magento’s built-in tools like “EXPLAIN” to identify and rectify performance bottlenecks in SQL queries.
- Database Sharding and Partitioning:
- For large-scale installations, consider sharding or partitioning the database to distribute load and improve query performance.
Server Resources Allocation for Handling Multiple Stores Efficiently:
- Server Configuration:
- Configure your server to handle the expected load by allocating sufficient CPU, memory, and storage resources.
- Utilize horizontal scaling by adding more servers to distribute the load, especially during peak traffic periods.
- PHP and Web Server Optimization:
- Optimize PHP settings in the “php.ini” file, such as increasing memory limits and max execution time.
- Fine-tune web server configurations (Apache or Nginx) for optimal performance, such as enabling Gzip compression and HTTP/2.
- Load Balancing:
- Implement load balancers to distribute traffic across multiple servers, ensuring that no single server is overwhelmed. This setup provides redundancy and improves reliability.
- Monitoring and Alerts:
- Use monitoring tools like New Relic, Nagios, or Datadog to track server performance and set up alerts for potential issues.
- Regularly review performance metrics and logs to identify and address bottlenecks proactively.
You May Also Read: Advanced Magento 2 Features for E-commerce Success
Conclusion
In conclusion, building a multi-store and multi-language Magento e-commerce solution allows business owners to reach more customers in different regions. For developers, Magento 2 provides the tools needed to set up these features easily, ensuring that the online store works smoothly for everyone, no matter where they are or what language they speak. This approach helps businesses grow and keeps customers happy by offering a consistent shopping experience.
Ready to expand your e-commerce business? Get in touch with us today to start building your multi-store, multi-language Magento solution!